
If you want to find out how to do something, such as do a mail merge in Word or fix a leaky valve on a radiator, where do you look first? Probably Youtube. Videos are an excellent way to explain something. More bandwidth than text and more scaleable than a 1-to-1 demo.
I’ve done explainer videos for all 3 of my products. But I found it a real struggle. I would write a script and then try to read the script and do the screencast at the same time and do it all in one take. I would stutter and stumble and it would take multiple attempts. It took ages and results were passable at best. I got some better software to edit the stumbles out, so I didn’t have to do it in one go. But it still took me a fair few attempts and quite a bit of editing. It became one of my least favourite things to do and so I did less and less of it.
Recently, I came across these slides on video by Christian Genco. These and subsequent Twitter exchanges with Christian convinced me that I should stop being a perfectionist about video and just start cranking them out on the grounds that a ‘good enough’ video is better than no video at all (‘the perfect is the enemy of the good’) and I would get better at it over time. As Stalin supposedly said “Quantity has a quality all of it’s own”.
So I have ditched the scripts and the perfectionism and I’ve managed to create 13 short Easy Data Transform explainer videos in the last week or so. And I am getting faster at it and (hopefully) a bit more polished. I’m definitely not an expert on this (and probably never will be) but here are some tips I have picked up along the way:
- Get some decent software. I use Camtasia on Windows and it seems pretty good.

- Try to talk slower.
- Try to sound upbeat (not easy if you are British and could voice double for Eeyore).
- Try not to move the mouse and talk at the same time. This makes editing a lot easier. Some people like to do the audio and the visual separately, but that seems like too much hassle.
- If you stumble, just take a deep breath, say it again and then edit the stumble out later.
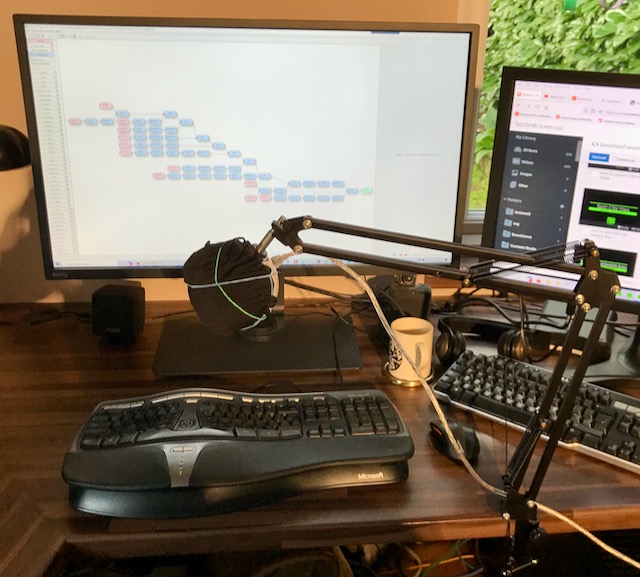
- Get a reasonable mic. I have a snowball mic on a cantilevered stand. I covered it with a thin cloth to try to reduce pops.
- The occasional ‘um’ is fine.
- Have a checklist of things to do for each video, so you don’t forget anything (such as disabling your phrase expander software or muting the phone).
I’m lucky to have a very quiet office, so I don’t have much background noise to contend with.
Using Camtasia I can easily add intos and outros, edit out stumbles and add various effects, such a mouse position highlighting and movement smoothing. I just File>Save as the previous project so that I don’t have to re-add the intro and outro. Unsurprisingly, Camtasia have lots of explainer videos. I wish there was a way to automatically ‘ripple delete’ any sections where there is no audio and no mouse movement (if there is, I haven’t found it). Some people recommend descript.com. It looks interesting, but I haven’t tried it.
I did an A/B test of recordings with my Senheiser headset mic against my Snowball mic and the consensus was that the headset was ok but the the Snowball mic sound quality was better.
Some people prefer to use synthetic voices, instead of their own voice. While these synthetic voices have improved a lot, they never sound quite right to me. Also it must be time consuming to type out all the text. Or you can pay to have a professional voiceover done, but this is surprisingly expensive (around $100 per minute, last time I checked) and almost certainly more time consuming than doing it yourself.
Some people aren’t confident about speaking on videos because they are not native speakers of that language and have an accent. Personally accents don’t bother me at all. In fact I like hearing English spoken with a foreign accent, as long as I can understand it. Also I think there is an authenticity to hearing a creator talk about their product in their own voice.
I’m not a big fan of music on explainer videos, so I don’t add any.
I let Youtube generate automatic captions for people that want them (which could be people in busy offices and on trains and planes, as well as the hearing impaired). They aren’t perfect, but they are good enough.
My videos are aimed at least as much at finding new users as helping existing users. So I make sure I research keyword terms (mostly in Google Adwords) before I decide which videos to make and what to title them. Currently I am targetting very specific keyword searches, such as How to convert CSV to Markdown. Easy Data Transform can do a lot more than just format conversion, but from an SEO point of view it is better to target the phrases that people are actually searching for.
I upload the videos as 1080P (1920 x 1080 pixels) on to the Easy Data Transform Youtube channel and onto my screencast.com account (which I pay a yearly fee for). I then embed the screencast.com videos on relevant easydatatransform.com pages using IFRAME embed codes created by screencast.com. I don’t use the Youtube videos on my website, because I don’t want people to be distracted by Youtube ads and ‘you may also like’ recommendations. They might be showing a competitor! I don’t host the videos on the website itsself as I worry that might slow down the website. I also link to the videos in screencast.com from my help documentation, as appropriate.
Some people like to embed video of themselves in screencasts, in the hope of making it more engaging. But personally I want people to concentrate on my software, rather than being distracted by the horror of my face. And not having to comb my hair or look smart was part of what got me into running my own software business.
In the next few months I will be checking my analytics to see how many views these videos get and whether they increase the time on page and reduce the bounce rate.
If you can spare a few seconds to go to my Youtube page and ‘like’ a video ot two or subscribe, that would be a big help!
Note that some of the above doesn’t apply when you are creating a demo video for your home page, rather than an explainer video. Your main demo video should be slick and polished.


 Online businesses generate a lot of data. Sales data, marketing data, traffic data etc. Pivot tables can be a useful tool for analysing and extracting useful information from this sea of data. A lot of people seem to have heard of Pivot Tables without understanding what they are or how to use them. Despite the slightly cryptic name they are really just a way of summarizing tables of data. Nothing to be intimidated by. I’m going to try to demystify them here with a simple example.


